前言
本文针对于熟悉 C++ Qt 的开发者需要使用 PyQt 而准备的快速入门教程。本文以 PyQt 6 为例,实际上与 PyQt 5 无异,5 与 6 的差异,更多是接口上的差异。
Python 中,对 Qt 库的绑定,除 PyQt,还有 PySide,两者差异不大,逻辑基本通用。
第一个程序
使用 PyQt 之前,需要安装对应库:
推荐使用虚拟环境,本文环境为 Pycharm 创建的工程。
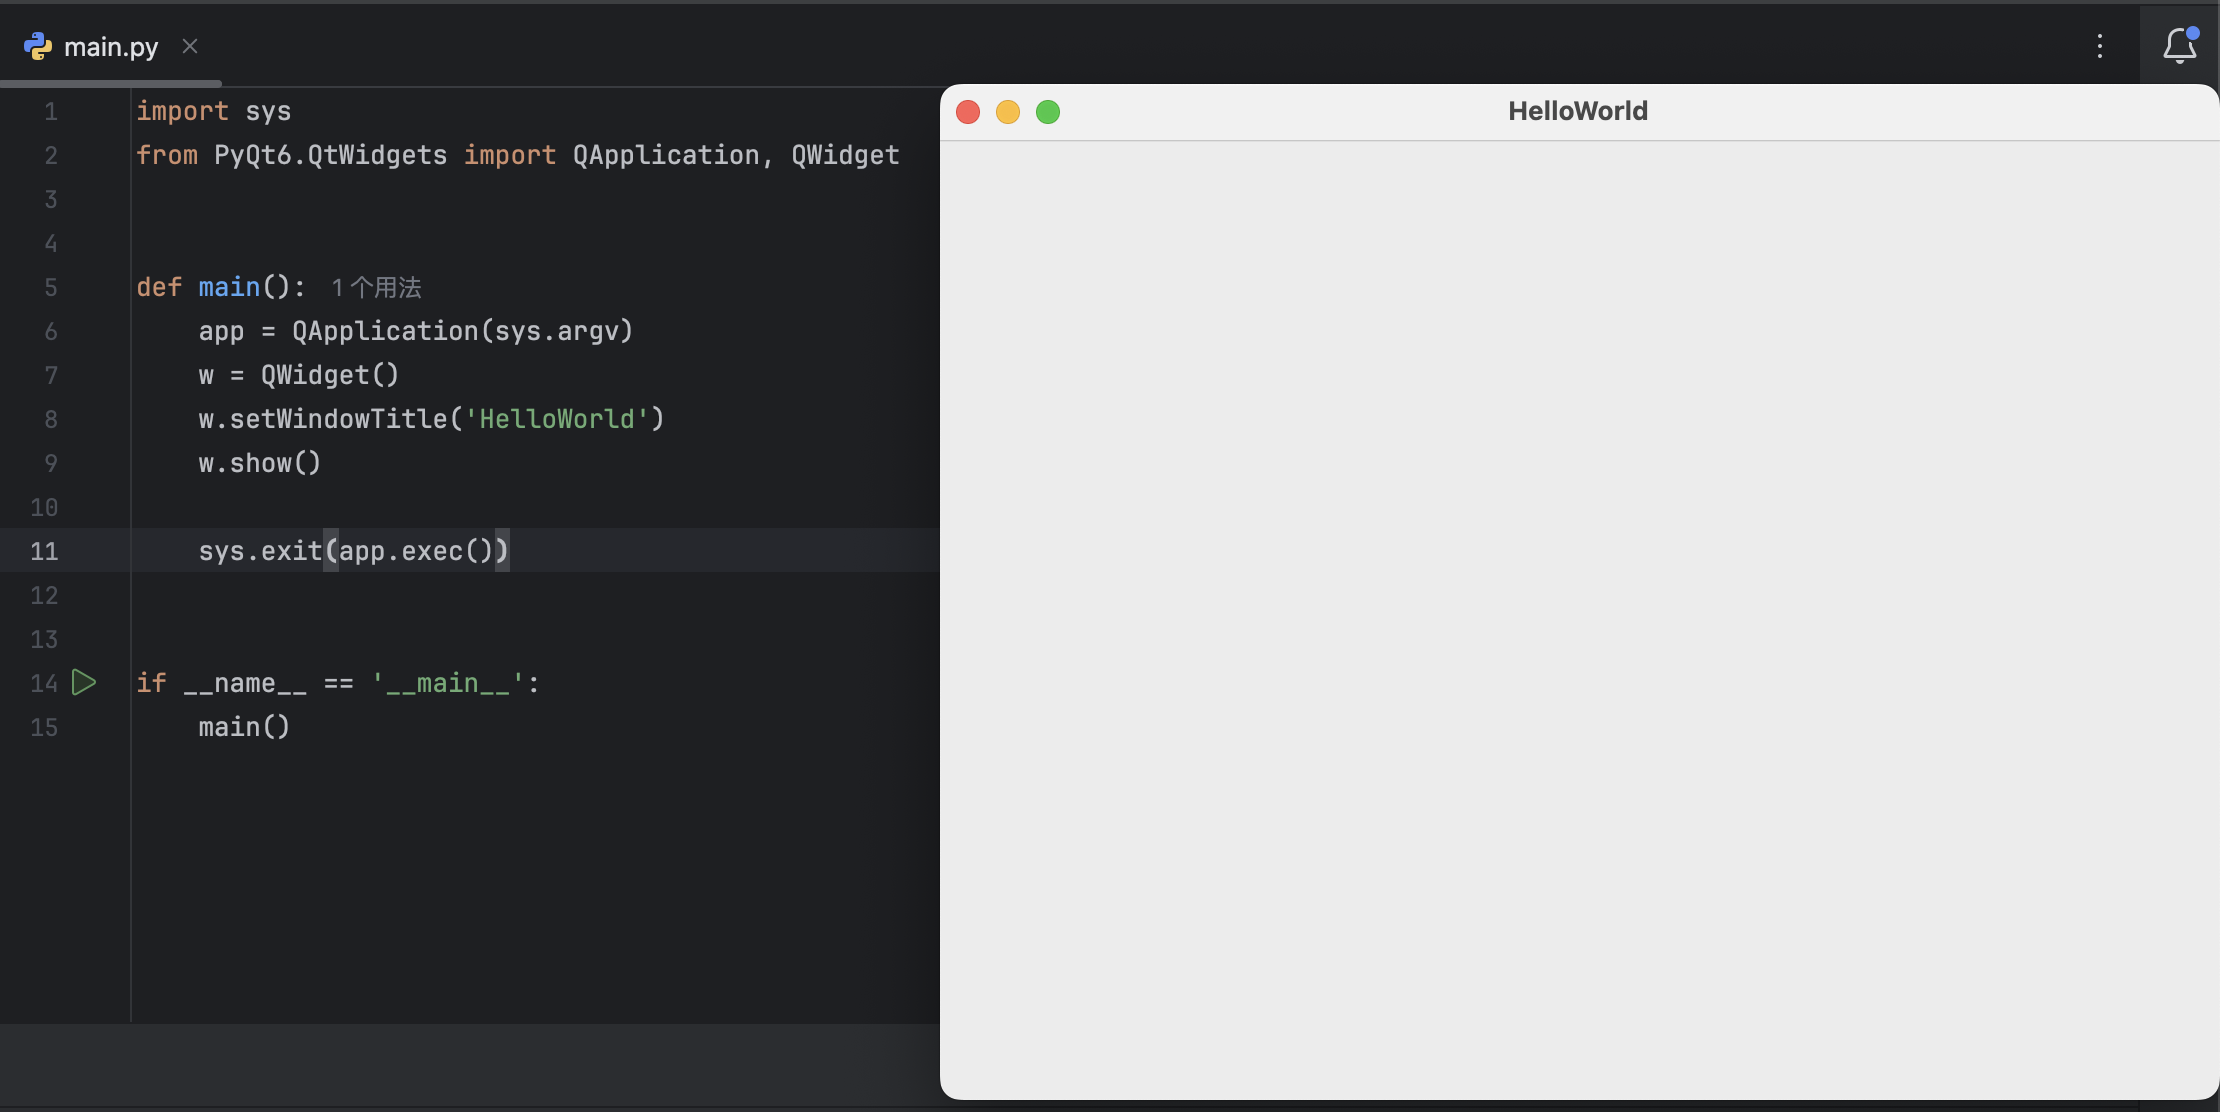
Hello world:
 1
 2
 3
 4
 5
 6
 7
 8
 9
10
11
12
13
14
15
| import sys
from PyQt6.QtWidgets import QApplication, QWidget
def main():
app = QApplication(sys.argv)
w = QWidget()
w.setWindowTitle('HelloWorld')
w.show()
sys.exit(app.exec())
if __name__ == '__main__':
main()
|

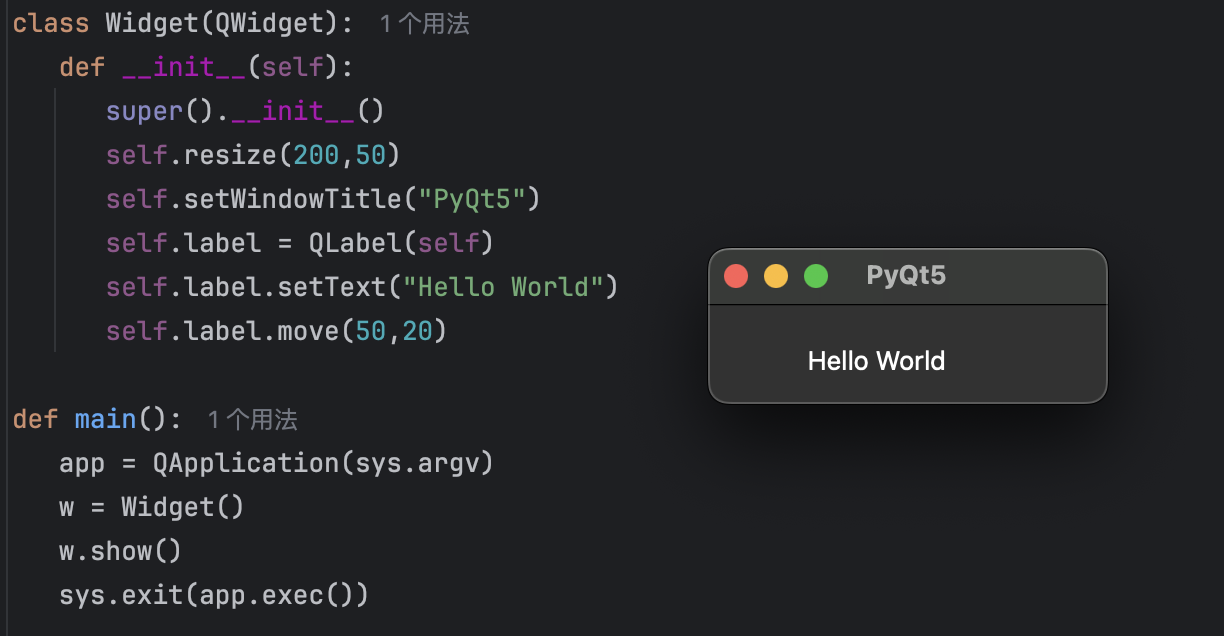
自定义 Widget 类:
 1
 2
 3
 4
 5
 6
 7
 8
 9
10
11
12
13
14
15
16
17
18
19
20
21
22
| import sys
from PyQt6.QtWidgets import QApplication, QWidget, QLabel
class Widget(QWidget):
def __init__(self):
super().__init__()
self.resize(200,50)
self.setWindowTitle("PyQt5")
self.label = QLabel(self)
self.label.setText("Hello World")
self.label.move(50,20)
def main():
app = QApplication(sys.argv)
w = Widget()
w.show()
sys.exit(app.exec())
if __name__ == '__main__':
main()
|

使用 Qt Designer 创建 UI
PyQt 同样可以使用 Qt Designer 设计 UI 界面。打开 Designer,创建窗体,然后保存为 .ui 文件。
当设计好界面后,在 PyQt 中如何引用.ui文件呢?
这里有两种方法可以实现:
- 将
.ui文件转为.py文件,以类的形式引用。 - 动态加载
.ui文件。
得益于 Python 动态语言的特性,可以动态加载.ui文件,可玩性会更高。
方法一:ui转py文件
在终端进入虚拟环境,使用pyuic命令转为 py 文件:
1
2
| (.venv) ~/Documents/code/pythonProject/pyqt_demo
pyuic6 -x widget.ui -o widget.py
|
-x 选项是可选的,用于生成额外的代码来测试和显示类,即会在 widget. py 多添加以下代码:
1
2
3
4
5
6
7
8
| if __name__ == "__main__":
import sys
app = QtWidgets.QApplication(sys.argv)
Form = QtWidgets.QWidget()
ui = Ui_Form()
ui.setupUi(Form)
Form.show()
sys.exit(app.exec())
|
在 main. py 中,可以这样引用 ui 文件:
 1
 2
 3
 4
 5
 6
 7
 8
 9
10
11
12
13
14
15
16
17
18
19
| import sys
from PyQt6.QtWidgets import QApplication, QWidget, QLabel
from widget import Ui_Form
class Widget(QWidget):
def __init__(self):
super().__init__()
self.ui = Ui_Form()
self.ui.setupUi(self)
def main():
app = QApplication(sys.argv)
w = Widget()
w.show()
sys.exit(app.exec())
if __name__ == '__main__':
main()
|
pyuic 工具 -h 帮助输出:
 1
 2
 3
 4
 5
 6
 7
 8
 9
10
11
12
13
14
15
16
17
18
19
| pyuic6 -h
usage: pyuic6 [-h] [-V] [-p] [-o FILE] [-x] [-d] [-i N] [-w N] ui
Python User Interface Compiler
positional arguments:
ui the .ui file created by Qt Designer or a directory containing .ui files
options:
-h, --help show this help message and exit
-V, --version show program's version number and exit
-p, --preview show a preview of the UI instead of generating code
-o FILE, --output FILE
write generated code to FILE instead of stdout
-x, --execute generate extra code to test and display the class
-d, --debug show debug output
-i N, --indent N set indent width to N spaces, tab if N is 0 [default: 4]
-w N, --max-workers N
use a maximum of N worker processes when converting a directory [default: 0]
|
方法二:动态加载ui文件
使用 loadUi()方法动态加载.ui文件
 1
 2
 3
 4
 5
 6
 7
 8
 9
10
11
12
13
14
15
16
17
18
19
| import sys
from PyQt6.QtWidgets import QApplication, QWidget
from PyQt6.uic import loadUi
class Widget(QWidget):
def __init__(self):
super().__init__()
self.ui = loadUi('widget.ui', self)
self.ui.pushButton.clicked.connect(lambda: print('clicked'))
def main():
app = QApplication(sys.argv)
w = Widget()
w.show()
sys.exit(app.exec())
if __name__ == '__main__':
main()
|
两种方法各有千秋,可根据具体使用场景选择。
信号槽
PyQt 中的信号槽使用方式与 C++ Qt 有些差异,但理解用法后,就很简单了,PyQt 中的用法更像是调用函数指针。
1
2
3
4
5
6
7
8
9
| class Widget(QWidget):
def __init__(self):
super().__init__()
self.ui = Ui_Form()
self.ui.setupUi(self)
self.ui.pushButton.clicked.connect(self.on_button_clicked)
def on_button_clicked(self):
print('clicked')
|
发送自定义信号
在 PyQt 中,自定义信号需要使用pyqtSignal类。
 1
 2
 3
 4
 5
 6
 7
 8
 9
10
11
12
13
14
15
16
17
18
| from PyQt6.QtCore import QObject, pyqtSignal
class Foo(QObject):
# Define a new signal called 'trigger' that has no arguments.
trigger = pyqtSignal()
def connect_and_emit_trigger(self):
# Connect the trigger signal to a slot.
self.trigger.connect(self.handle_trigger)
# Emit the signal.
self.trigger.emit()
def handle_trigger(self):
# Show that the slot has been called.
print "trigger signal received"
|
也可单独定义一个信号类,用于通信:
1
2
3
| class Communicate(QObject):
send_message_signal = pyqtSignal()
param_changed_signal = pyqtSignal(str, bool)
|
param_changed_signal 信号为带参数信号,这里传递 str 和 bool 类型。
在 Widget 中关联信号槽:
 1
 2
 3
 4
 5
 6
 7
 8
 9
10
11
12
13
14
15
| class Widget(QWidget):
def __init__(self):
super().__init__()
self.ui = Ui_Form()
self.ui.setupUi(self)
self.ui.pushButton.clicked.connect(self.on_button_clicked)
self.c = Communicate()
self.c.send_message_signal.connect(self.on_signal_trigger)
def on_button_clicked(self):
print('clicked')
self.c.send_message_signal.emit()
def on_signal_trigger(self):
print('on_signal_trigger')
|
当按钮点击时,会发送 send_message_signal 信号,从而触发与之关联的槽函数 on_signal_trigger()。
当在两个类之间关联信号槽时,也是一样:
 1
 2
 3
 4
 5
 6
 7
 8
 9
10
11
12
13
14
15
16
17
18
19
20
21
22
| class Logic:
def __init__(self):
self.c = Communicate()
def send_message(self):
self.c.send_message_signal.emit()
class Widget(QWidget):
def __init__(self):
super().__init__()
self.ui = Ui_Form()
self.ui.setupUi(self)
self.ui.pushButton.clicked.connect(self.on_button_clicked)
self.logic = Logic()
self.logic.c.send_message_signal.connect(self.on_signal_trigger)
def on_button_clicked(self):
print('clicked')
self.logic.send_message()
def on_signal_trigger(self):
print('on_signal_trigger')
|
事件
以关闭窗口事件为例:
 1
 2
 3
 4
 5
 6
 7
 8
 9
10
11
12
| class Widget(QWidget):
def __init__(self):
super().__init__()
self.ui = Ui_Form()
self.ui.setupUi(self)
def closeEvent(self, event):
re = QMessageBox.information(self, '警告', '当前程序正在运行,是否确定退出?', QMessageBox.StandardButton.Yes, QMessageBox.StandardButton.No)
if re == QMessageBox.StandardButton.Yes:
QWidget.closeEvent(self, event)
else:
event.ignore()
|
总结
本文为作者在使用 PyQt 过程中,对遇到的问题总结,提炼出几个关键点,用于快速掌握 PyQt 的使用。由于有Qt的经验,当了解 PyQt 基本用法后,上手就简单了很多。
PyQt教程
PyQt5 教程
PyQt Documentation


