Featured image of post Automatically Build Hugo Blog Based on Github Actions

Automatically Build Hugo Blog Based on Github Actions

Preface

Hugo is one of the popular open source static website generators, which is used to generate final static pages to be placed on a web server for deployment.

Typically, the workflow might be something like this: write the article locally -> build the page locally -> upload the public folder to the cloud server. This step is a bit tedious, and this article simplifies the build and upload steps.

Here, we introduce how to automatically build static pages based on Github Actions and publish them to cloud servers to automatically update the content of the pages.

This article is based on the CaiJimmy/hugo-theme-stack-starter template of the Stack theme, which saves us a lot of work because it comes with Github Actions, we only need to modify the .github/workflows/deploy.yml file in the template to automate publishing to the cloud server.

Pre-requisites:

Of course, other themes will have similar quick-start templates, much the same.

Steps to implement

Modify the .github/workflows/deploy.yml file:

 1
 2
 3
 4
 5
 6
 7
 8
 9
10
11
12
13
14
15
16
17
18
19
20
21
22
23
24
25
26
27
28
29
30
31
32
33
34
35
36
37
38
39
40
41
42
43
44
45
46
47
48
49
50
51
52
53
54
55
56
57
name: Deploy to Cloud Server

on:
    push:
        branches: [master]
    pull_request:
        branches: [master]

jobs:
    build:
        runs-on: ubuntu-latest

        permissions:
            # Give the default GITHUB_TOKEN write permission to commit and push the
            # added or changed files to the repository.
            contents: write

        steps:
            - uses: actions/checkout@v3

            - name: Cache Hugo resources
              uses: actions/cache@v3
              env:
                  cache-name: cache-hugo-resources
              with:
                  path: resources
                  key: ${{ env.cache-name }}

            - uses: actions/setup-go@v4
              with:
                  go-version: "^1.17.0"
            - run: go version

            - name: Setup Hugo
              uses: peaceiris/actions-hugo@v2
              with:
                  hugo-version: "latest"
                  extended: true

            - name: Build
              run: hugo --minify --gc

            - name: Deploy to cloud server
              uses: burnett01/rsync-deployments@6.0.0
              with:
                  # -a: 表示以归档模式进行同步,保留文件的所有属性和权限
                  # -v: 表示输出详细的同步过程信息
                  # -z: 表示在传输文件时进行压缩,以减少传输时间和带宽
                  # -r: 表示递归地同步目录及其子目录
                  # --delete: 表示在目标目录中删除源目录中不存在的文件
                  switches: -avzr --delete
                  path: ./public
                  remote_path: /home/nginx/html/
                  remote_host: ${{ secrets.DEPLOY_HOST }} # 远程主机 IP
                  remote_port: ${{ secrets.DEPLOY_PORT }} # ssh 端口,默认为 22
                  remote_user: ${{ secrets.DEPLOY_USER }} # ssh user
                  remote_key: ${{ secrets.DEPLOY_KEY }} # ssh 私钥(云服务器创建密钥,下载的key.pem文件)

The code is well commented, so I’ll expand on it here. If you’re familiar with Github Actions, it should be pretty easy to understand. If you’re not, it’s okay, just copy it.

The focus is on the last step:

 1
 2
 3
 4
 5
 6
 7
 8
 9
10
11
12
13
14
15
 - name: Deploy to cloud server
              uses: burnett 01/ rsync-deployments@6.0.0
              with:
                  # -a: 表示以归档模式进行同步,保留文件的所有属性和权限
                  # -v: 表示输出详细的同步过程信息
                  # -z: 表示在传输文件时进行压缩,以减少传输时间和带宽
                  # -r: 表示递归地同步目录及其子目录
                  # --delete: 表示在目标目录中删除源目录中不存在的文件
                  switches: -avzr --delete
                  path: ./public
                  remote_path: /home/nginx/html/
                  remote_host: $ {{ secrets.DEPLOY_HOST }} # 远程主机 IP
                  remote_port: $ {{ secrets.DEPLOY_PORT }} # ssh 端口,默认为 22
                  remote_user: $ {{ secrets.DEPLOY_USER }} # ssh user
                  remote_key: $ {{ secrets.DEPLOY_KEY }} # ssh 私钥(云服务器创建密钥,下载的 key. pem 文件)

Use the burnett 01/rsync-deployments workflow, which uses Linux’s rsync command to synchronize files to the corresponding cloud server.
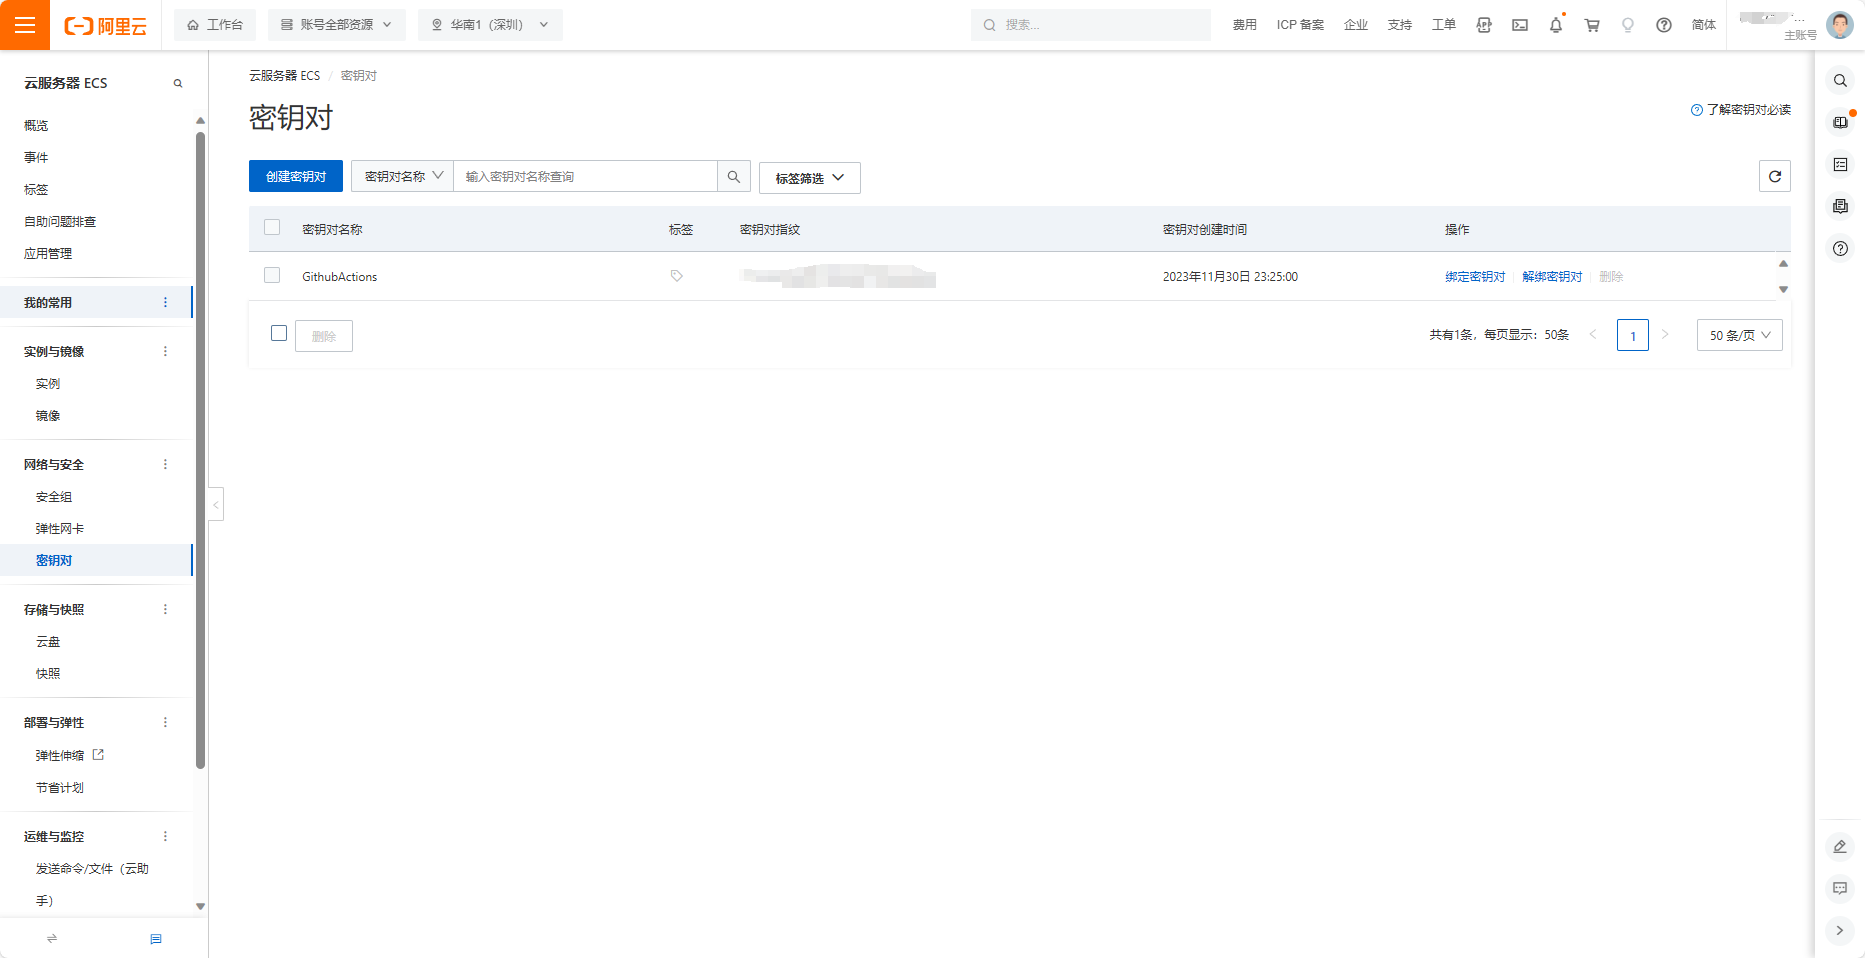
  • remote_path is the directory where the site is mounted on the cloud server, e.g. I’m using nginx here, and the mount directory is /home/nginx/html/.

  • remote_host is the public IP of the cloud server.

  • remote_port is the ssh login port, the default is 22, if you have changed it, just fill in the corresponding port.

  • remote_user is the username of the cloud server.

  • remote_key is the key for the cloud server, this should be noted, not the ssh login password, but the key created through the cloud server vendor’s console. For example, I’m using Aliyun’s server here, create one on the cloud server ECS page, Network & Security - Key Pairs, and you’ll get a xxxx. pem file, save this file, you’ll need it later.

image-20231204223253071

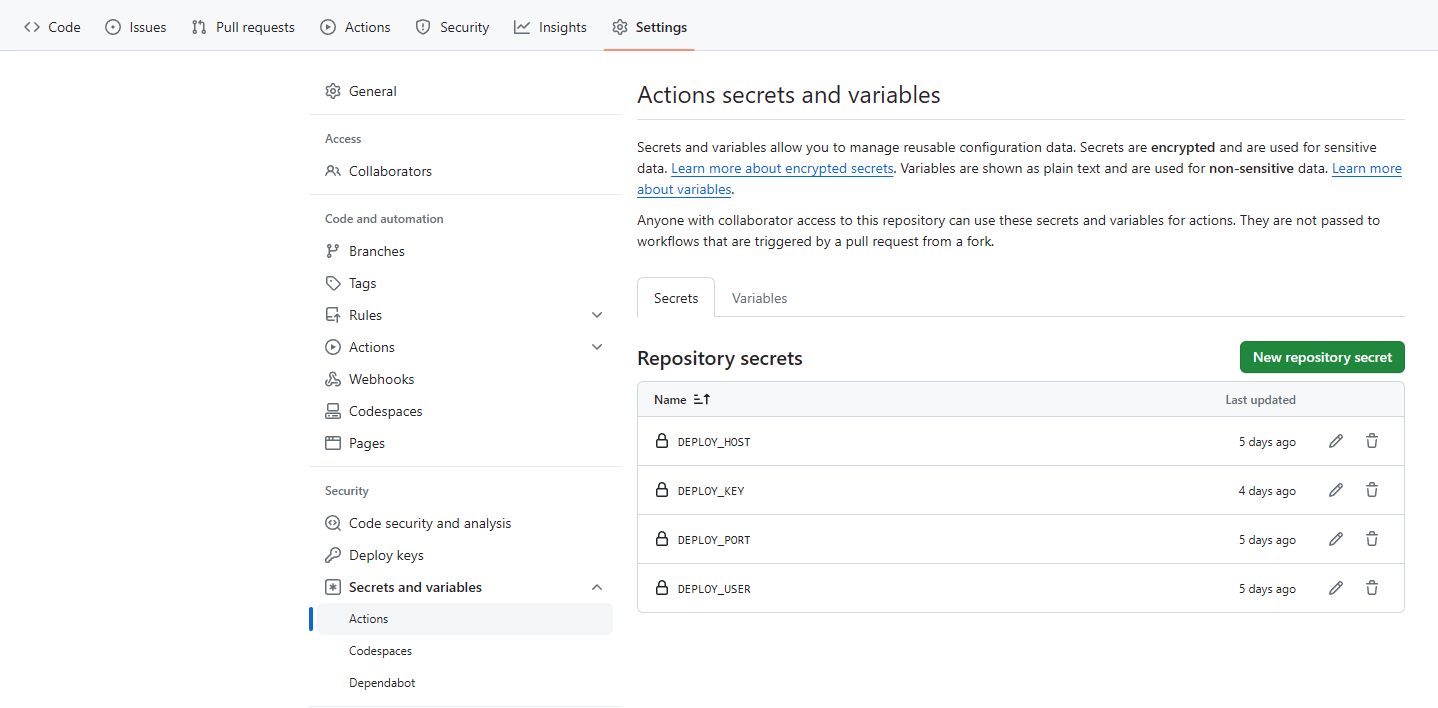
Then, go to the GitHub blog repository and add the secret key in the Settings - Secrets and variables - Actions interface.

Create the secret:

  • DEPLOY_HOST for the public IP.
  • DEPLOY_PORT for the ssh port
  • DEPLOY_USER for the username.
  • DEPLOY_KEY with the contents of the xxx. pem file.

image-20231204223825048

After that, log in to your cloud server and check if rsync is installed and if it is running:

1
2
3
4
5
6
~# systemctl status rsync
○ rsync. service - fast remote file copy program daemon
     Loaded: loaded (/lib/systemd/system/rsync. service; disabled; vendor preset: enabled)
     Active: inactive (dead)
       Docs: man: rsync (1)
             man: rsyncd.conf (5)

Active: inactive (dead) means it’s not started, we set it to boot automatically:

1
2
systemctl enable rsync
systemctl start rsync

Then use systemctl status rsync to see:

 1
 2
 3
 4
 5
 6
 7
 8
 9
10
~# systemctl status rsync
○ rsync. service - fast remote file copy program daemon
     Loaded: loaded (/lib/systemd/system/rsync. service; enabled; vendor preset: enabled)
     Active: inactive (dead)
  Condition: start condition failed at Thu 2023-11-30 23:29:42 CST; 3 days ago
             └─ ConditionPathExists=/etc/rsyncd. conf was not met
       Docs: man: rsync (1)
             man: rsyncd.conf (5)

Nov 30 23:29:42 ecs systemd[1]: Condition check resulted in fast remote file copy program daemon being skipped.

After adding the line Condition: start condition failed at Thu 2023-11-30 23:29:42 CST; 3 days ago, it works!

Verify

1
2
3
git add -u
git commit -m "add actions"
git push

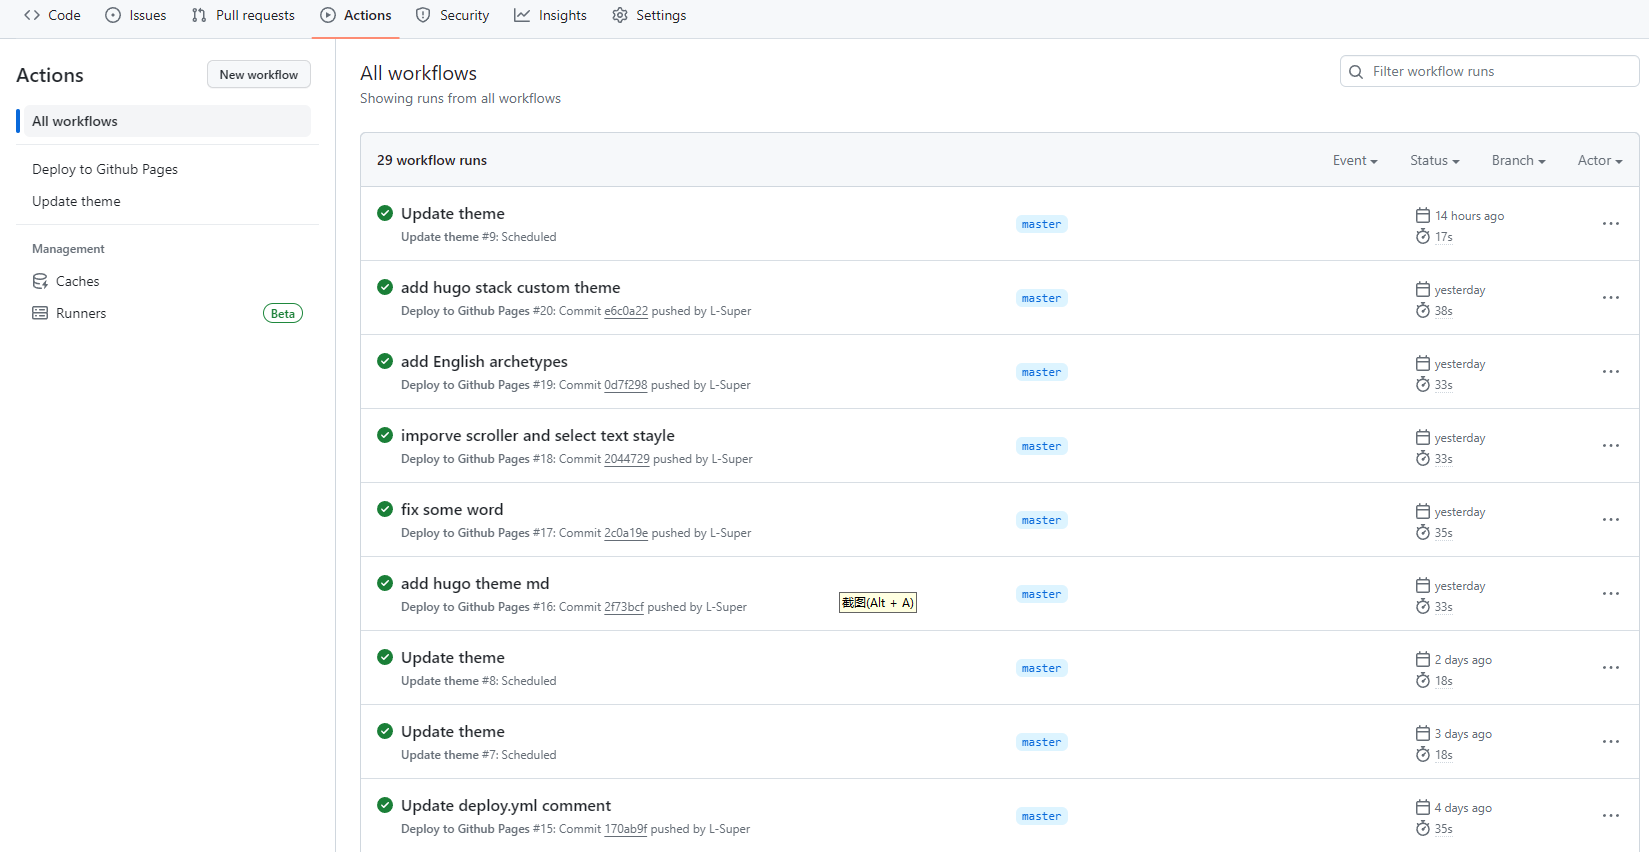
After the git trilogy head over to GitHub to see the results!

image-20231204230408478

Also, check if your blog has been updated.

Summary

In this article, we have introduced the method of Github Action to automatically build and publish to cloud servers, of course, you can also publish directly to GitHub Pages, since this is simpler, you can directly refer to Automatically Build Hugo Blog Based on Github Action.

基于 Github Action 自动构建 Hugo 博客 - (lixueduan.com)