
Preface
After the blog is built, you can add a comment system to facilitate the exchange of feedback from readers. Here the choice is Waline, because Hugo Stack theme supports Waline, so it will be much easier to configure. At the same time Waline, just a few steps, you can enable Waline to provide comment service in your website.
So, in this article, we are going to introduce to add Waline commenting system to your blog and configure it to receive email notification alerts for blog comments at your own domain email address.
Since Waline documentation is quite detailed, so I’m going to copy it directly and make some changes for my own needs.
LeanCloud Settings (Database)
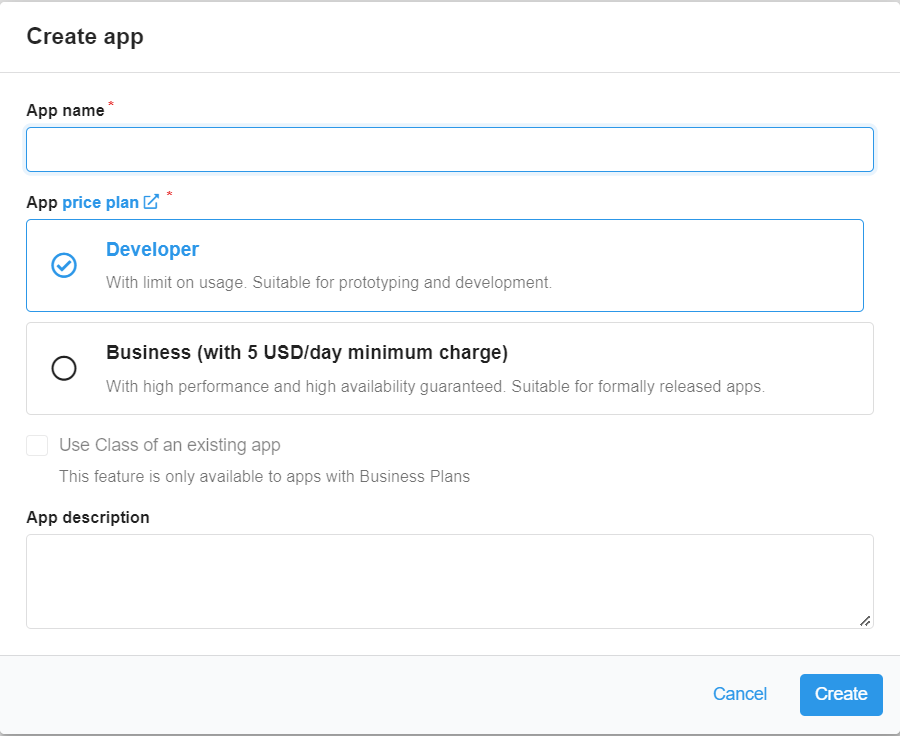
Click Create app button to create a new app and enter a name you like:
Enter the app, then select
Settings>App Keysat the left bottom corner. You will seeAPP ID,APP KeyandMaster Keyof your app. We will use them later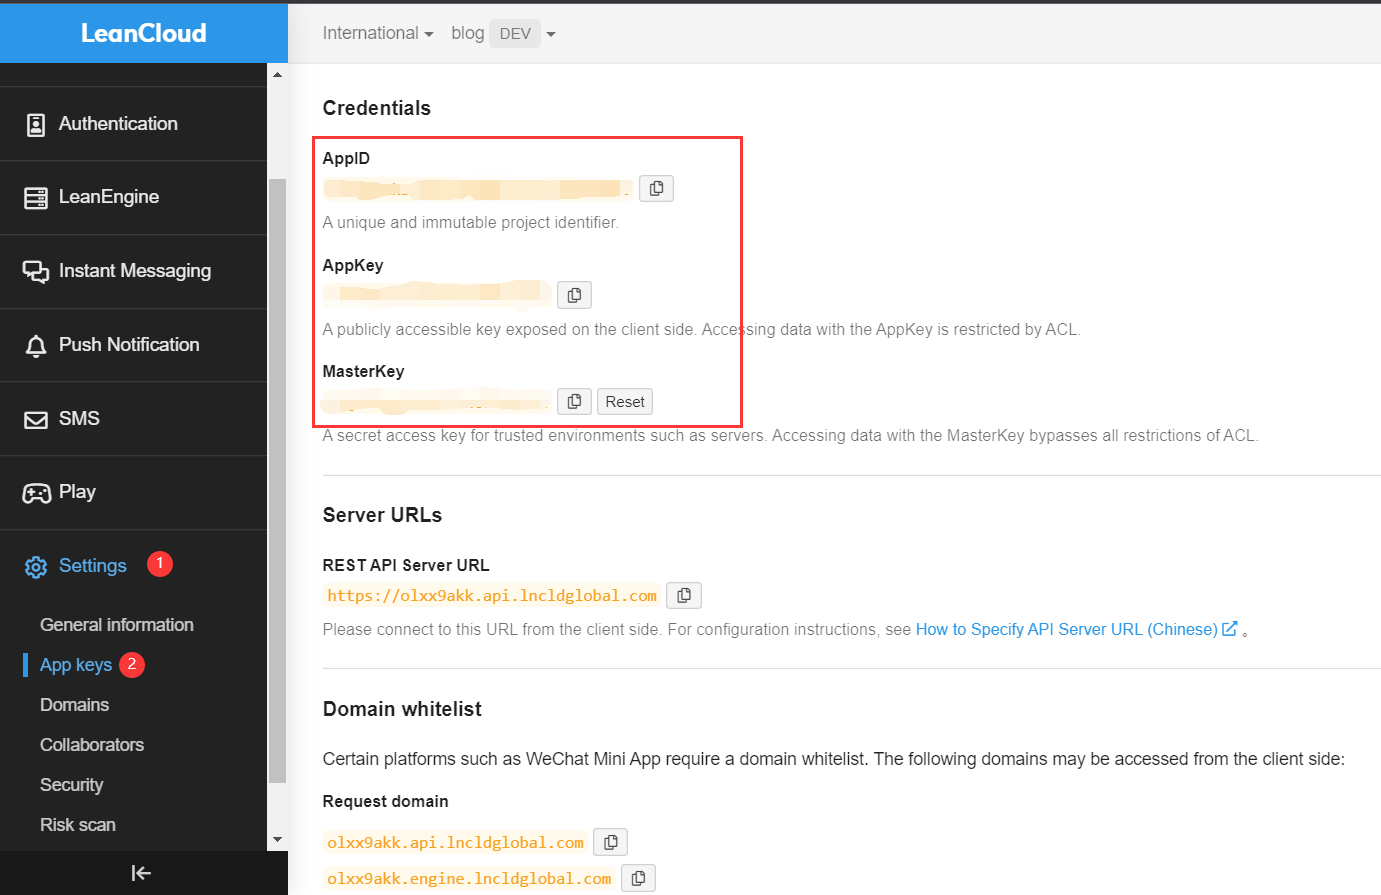
Deploy to Vercel (Server)
 Vercel
Click the blue button above, it will redirect you to vercel to deploy with waline template.
Note
If you haven’t logged ine, we recommend you to sign in with GitHub.
Input your Vercel project name then click
Create.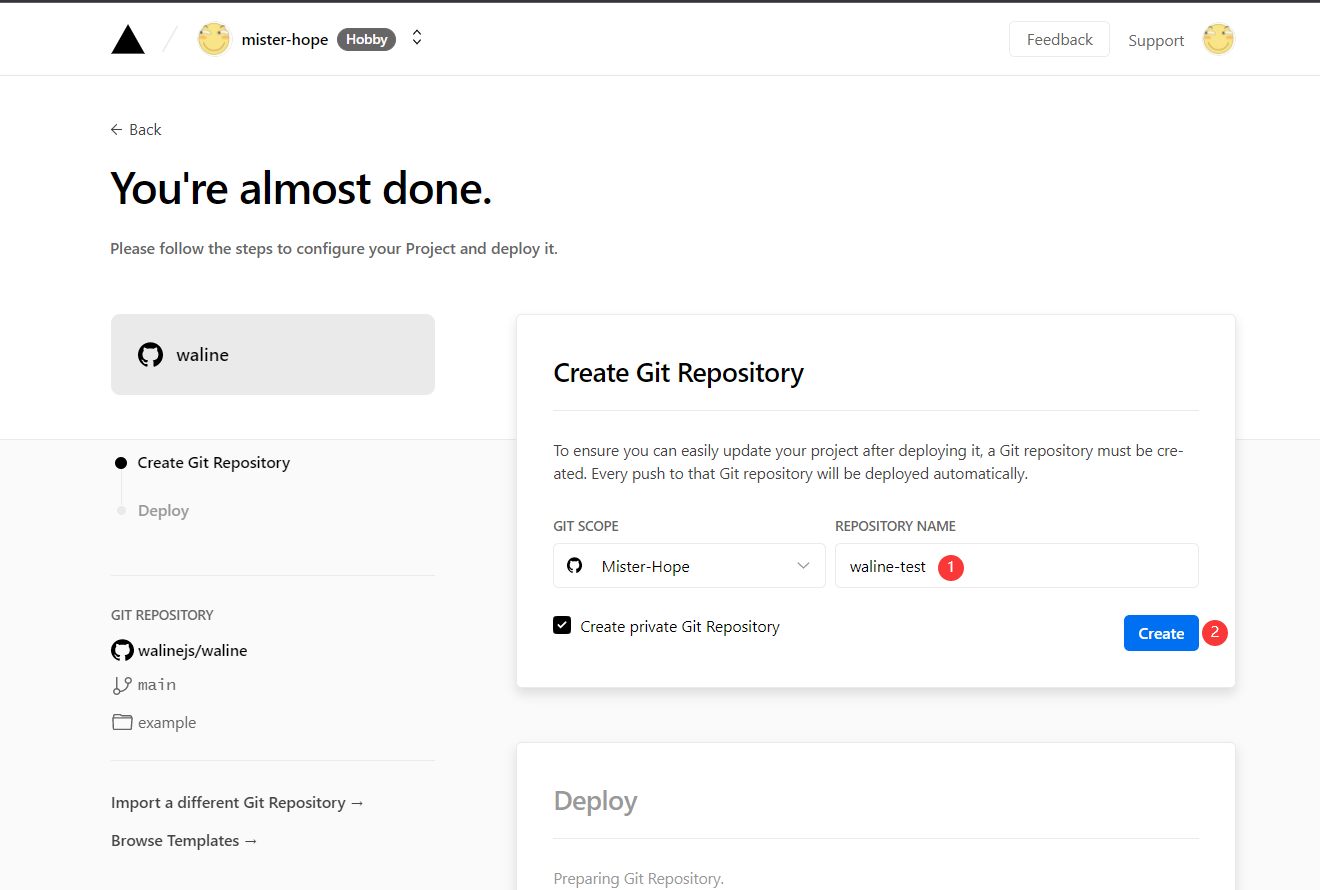
Repo which named you input before will be created and initialized automatically base on waline example template by Vercel.
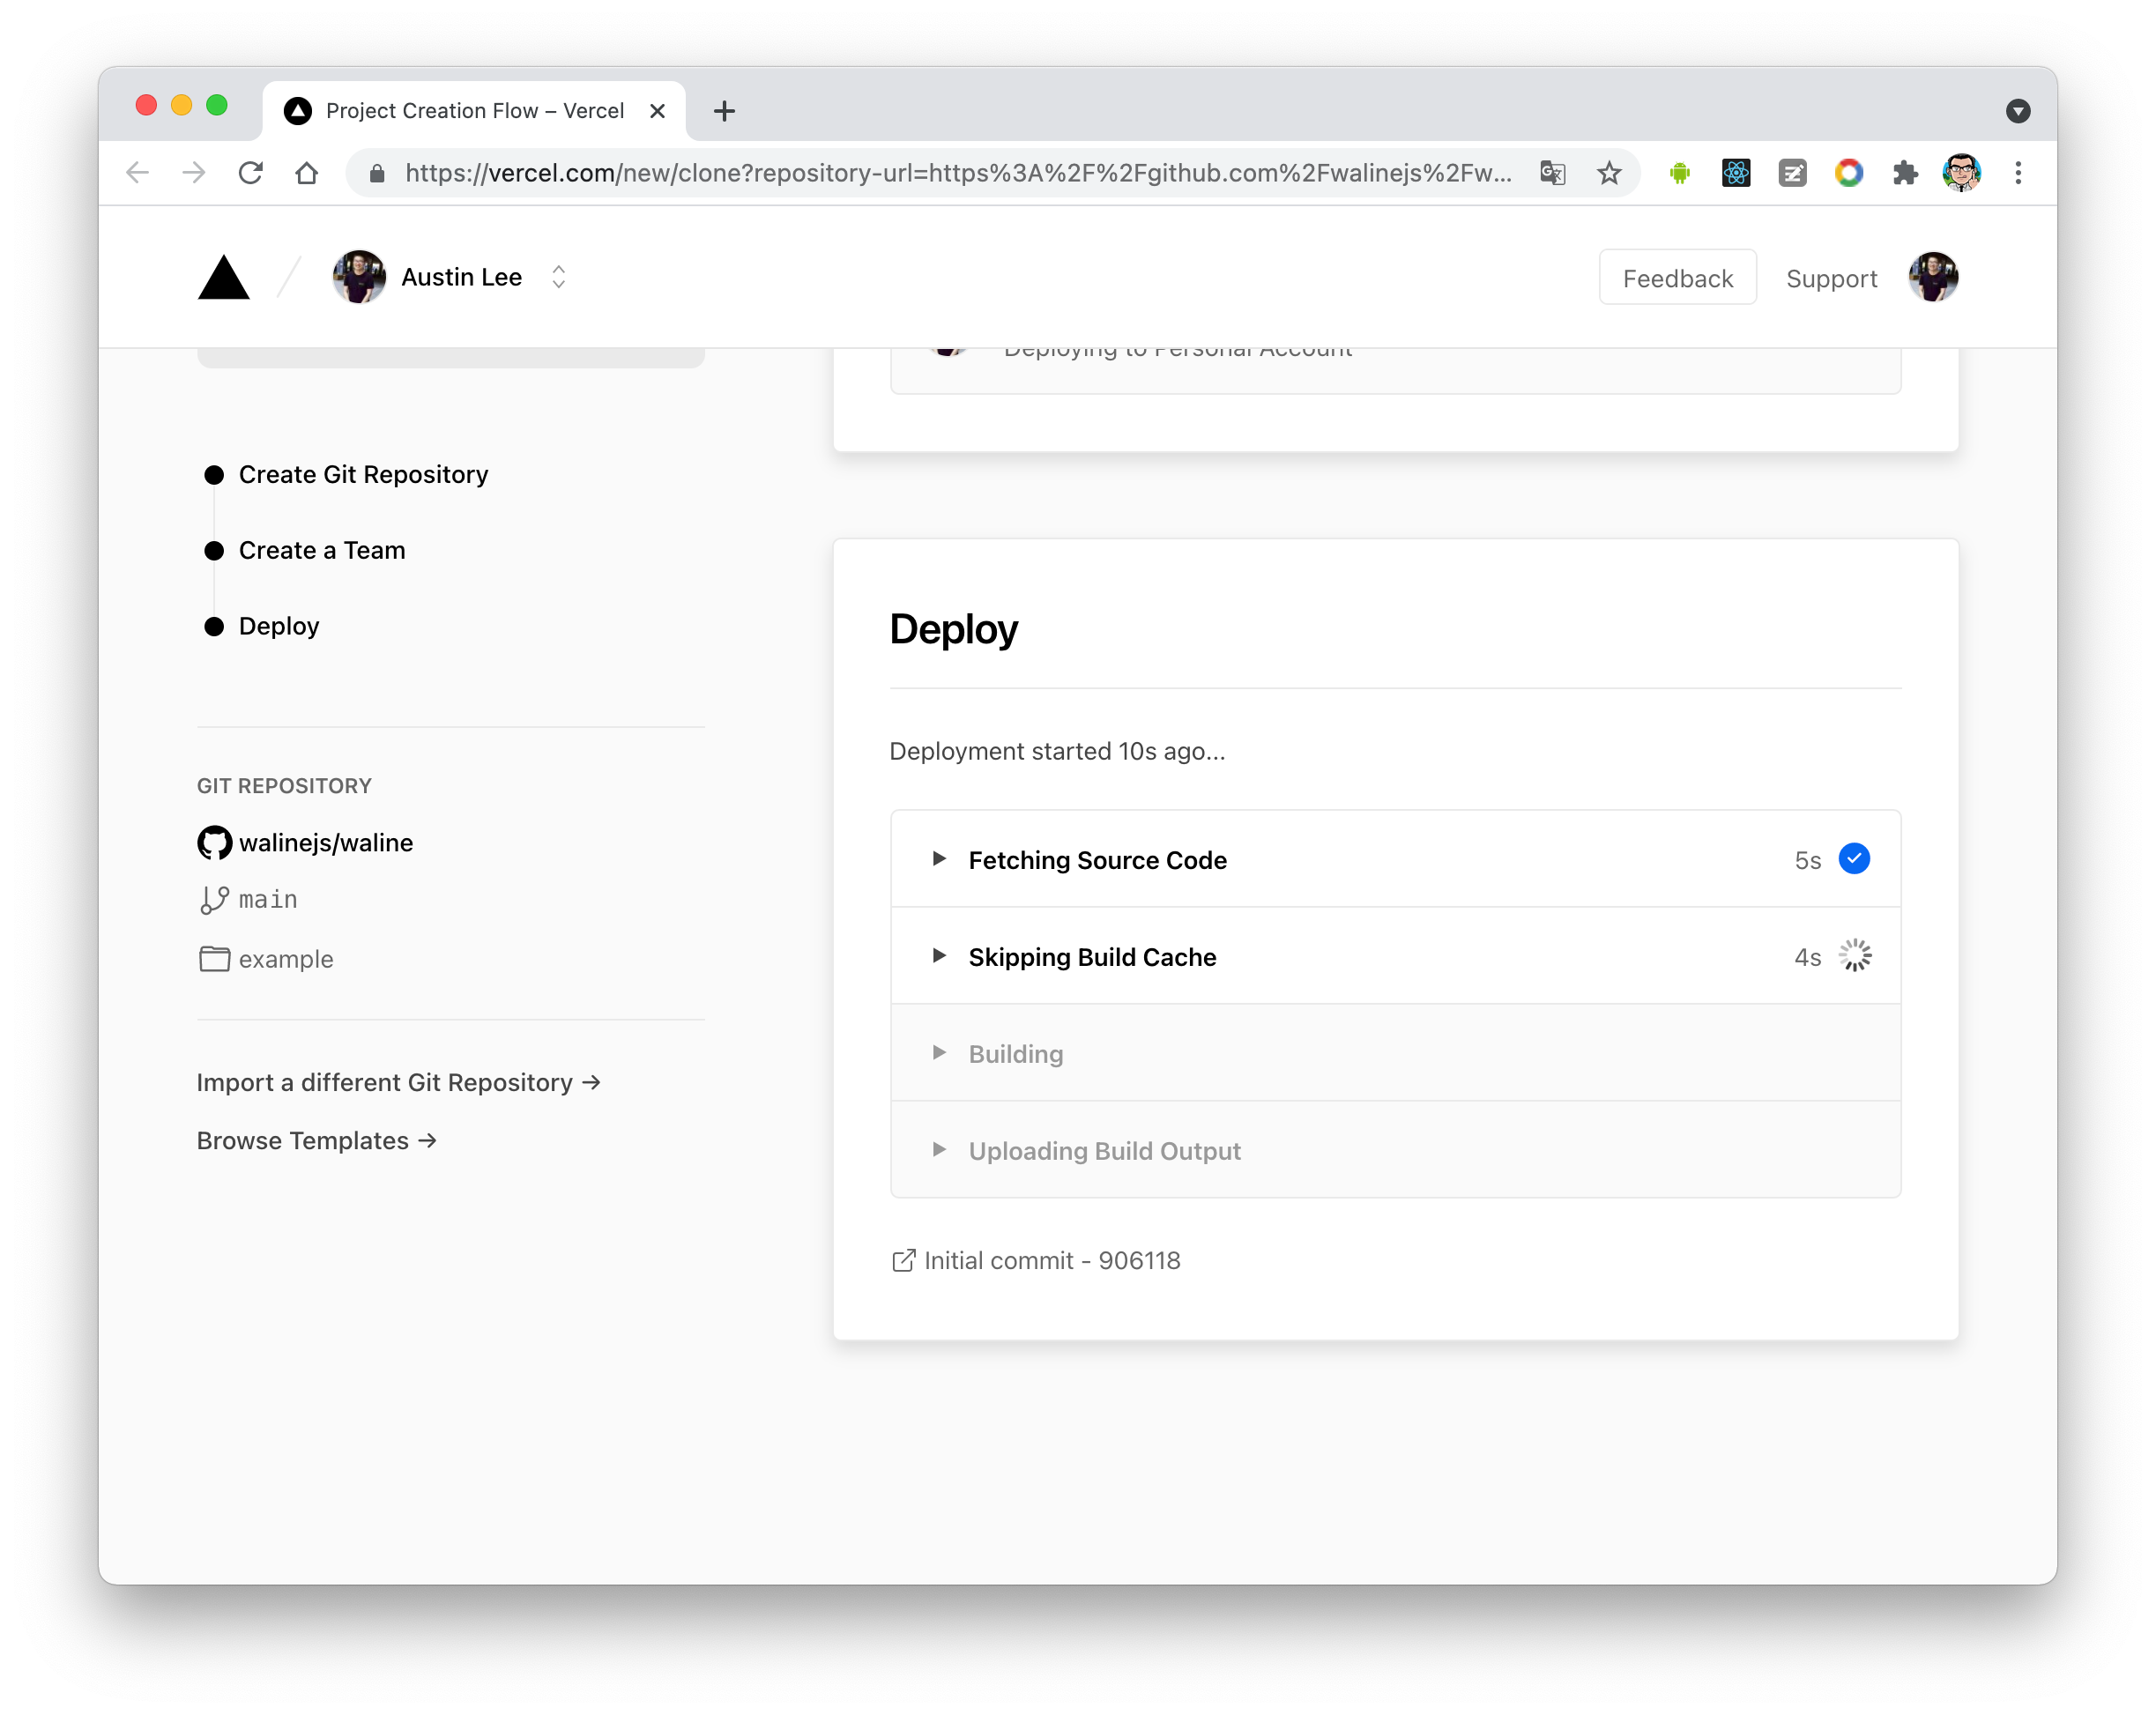
After one minute or two, vercel should finish the deployment. Click
Go to Dashboardbutton to redirect to your application dashboard.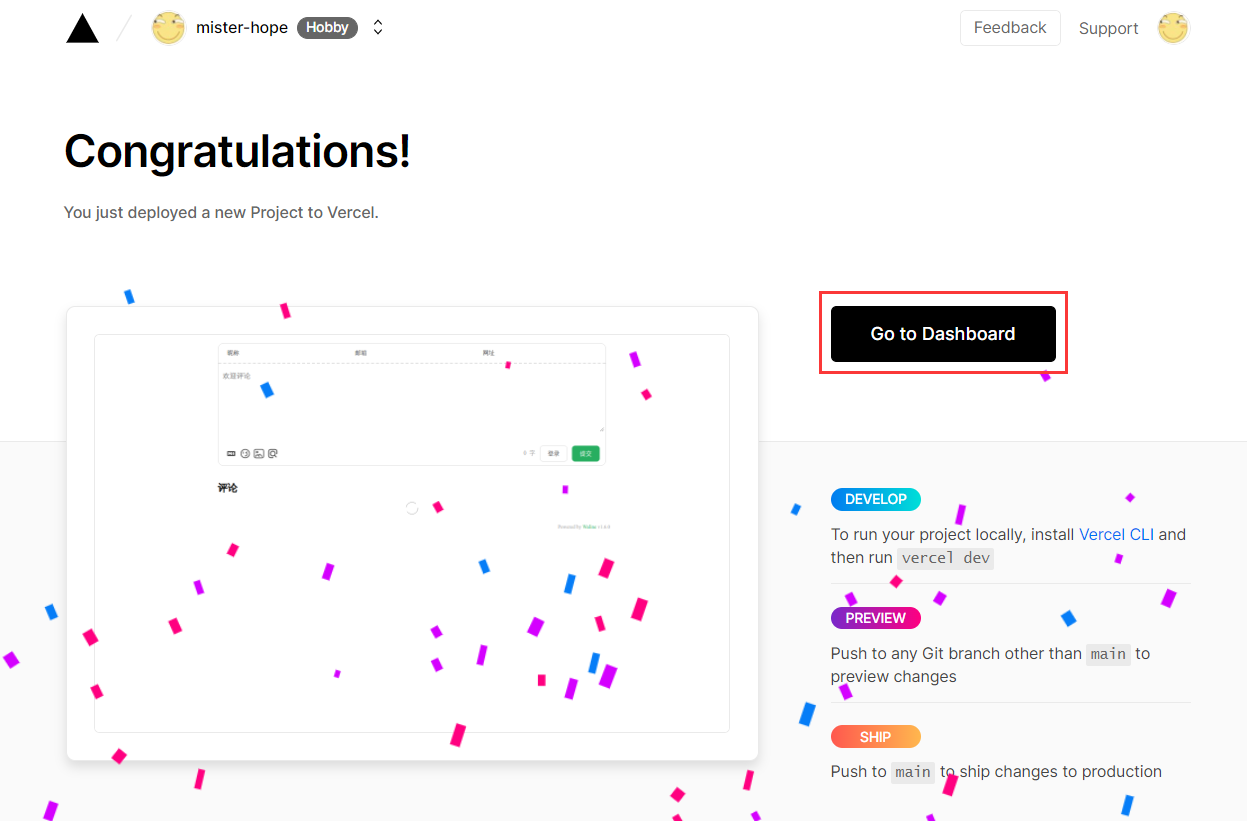
Click
Settingsmenu on the top, andEnvironment Variablesbutton on the side to go to environment variables setting page. Then setLEAN_ID,LEAN_KEYandLEAN_MASTER_KEY. The variables’ value should be the ones you got in the previous step.APP IDis the value ofLEAN_ID, andAPP KeytoLEAN_KEY,Master KeytoLEAN_MASTER_KEY. You can learn more about other variables here.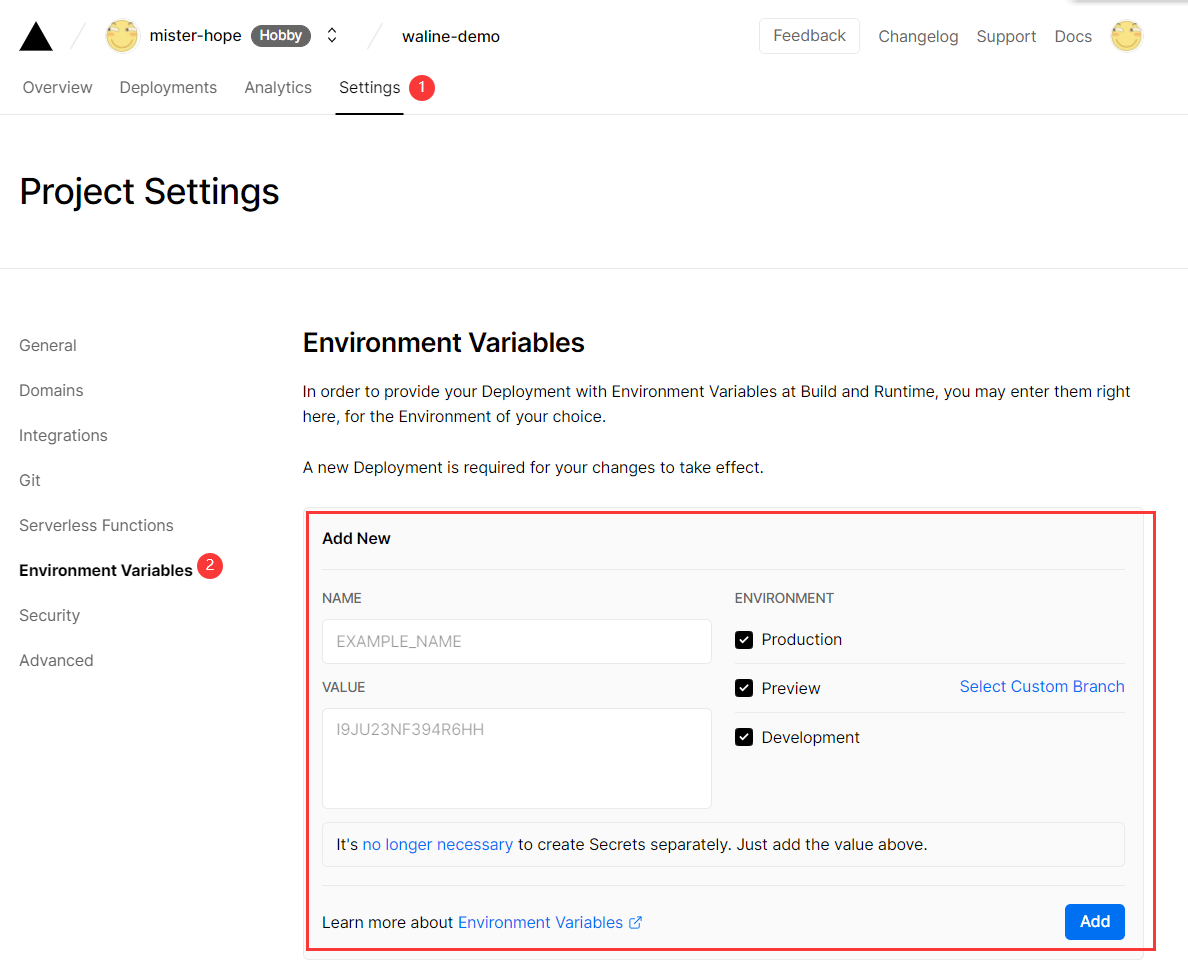
To let your environment variables setting active, you need redeploy your application. Click
Deploymentsmenu on the top and find the latest deployment at the top of list, clickRedeploybutton in the right dropdown menu.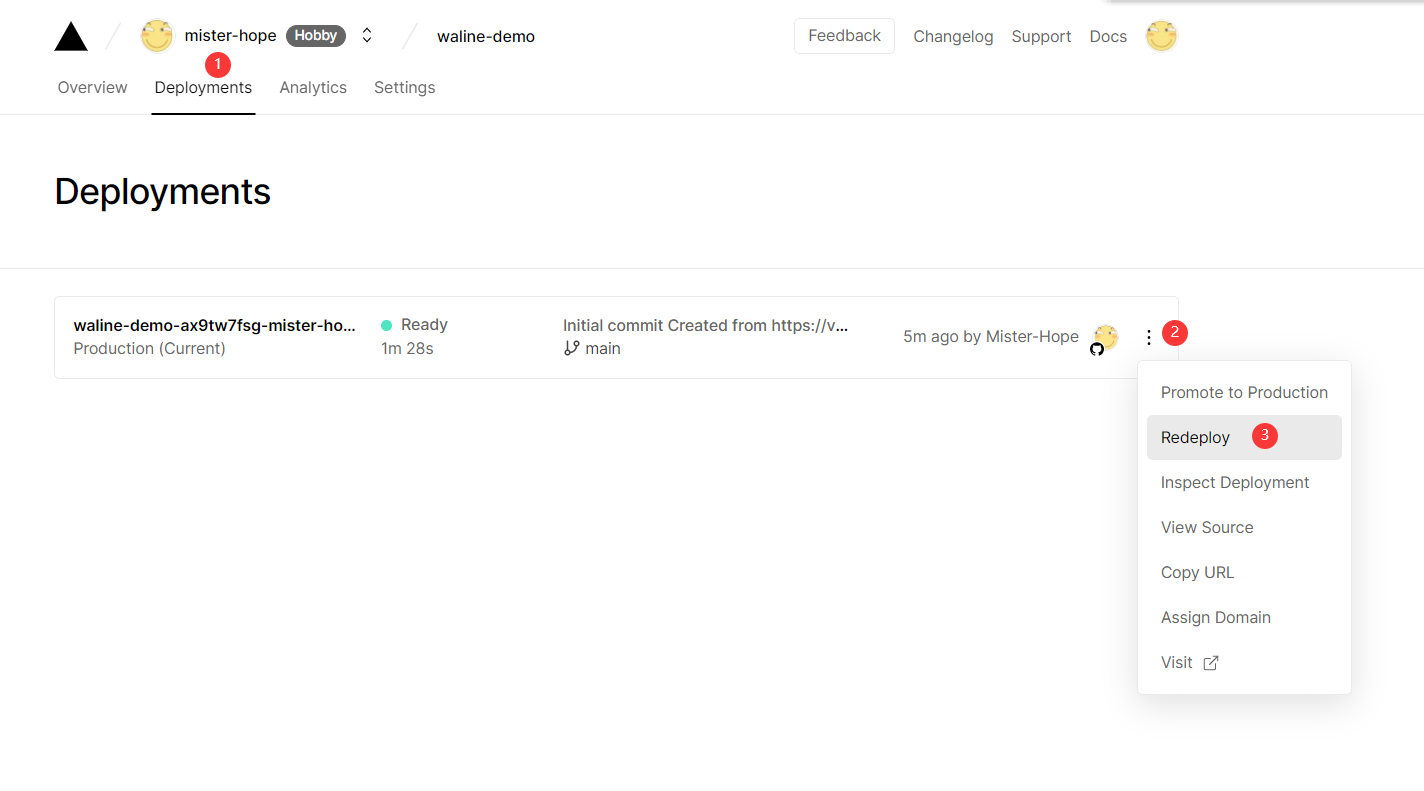
If everything is ok, vercel will redirect to
Overviewpage to start redeployment. Wait a moment theSTATUSwill change toReady. Now you can clickVisitto visit the site. This link is your server address.
Stack theme with Waline enabled
Find this block in the config/_default/params.toml configuration file:
| |
Change enabled to true, provider to waline, and then set the waline-related configuration in the comments.waline block:
| |
Just change serverURL to the server address of your vercel.
The comment service will now run successfully on your website 🎉!
Comment Management (Management)
- After the deployment is complete, please visit
<serverURL>/ui/registerto register. The first person to register will be set as an administrator. - After you log in as administrator, you can see the comment management interface. You can edit, mark or delete comments here.
- Users can also register their account through comment box, and they will be redirected to their profile page after logging in.
Email notification
Email notification needs the following environment variables to be configured:
SMTP_SERVICE: SMTP Mail delivery service providerTips
You can find all support provider in here. If your provider is not listed, you must config
SMTP_HOSTandSMTP_PORT.SMTP_HOST: SMTP server address, it can be found in mailbox’s setting page generally.SMTP_PORT: SMTP server port, it can be found in mailbox’s setting page generally.
SMTP_USER: SMTP Mail delivery service account, it’s your email address.SMTP_PASS: SMTP Mail delivery service password, it’s your email password.SMTP_SECURE: SMTP connect with SSL, eithertrueorfalse.SITE_NAME: Your site name, will be displayed in notification message.SITE_URL: Your site url, will be displayed in notification message.SENDER_NAME: Custom sender’s name in notificationSENDER_EMAIL: Custom sender’s name in notification, required for some SMTP services.
Here we have chosen Brevo, for the configuration of Brevo see Free to build their own domain name personality email (limuran.top)
| |
Once you’ve created it, head over to Vercel to continue adding environment variables.
The required environment variables are listed below:
| Key | Value | Comment |
|---|---|---|
| SMTP_SERVICE | SendinBlue | |
| SMTP_USER | Brevo Login | |
| SMTP_PASS | Brevo’s SMTP key value | |
| SITE_NAME | ||
| SITE_URL | ||
| AUTHOR_EMAIL | ||
| SENDER_NAME | Sender’s Nickname | |
| SENDER_EMAIL | Sender’s Domain Email(example:limuran@limuran.top) |
The empty Value is added by itself.
Then click the Redeploy button again to redeploy, it will take effect and you can test it afterwards.
Video Tutorial
An enthusiastic Waline user made the following video tutorial. If the instructions above are not clear, you can refer to the video: